Instructions for Creating Accounts and Depositing On Bybit
Please visit the following link to Register: Click Here
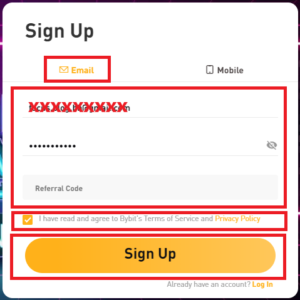
Sign Up By Email
Please enter the following information:
- Email address
- Strong password
- Referral code (optional)
Make sure you understand and agree to the terms and privacy policy, and after checking that the information entered is correct, click “Sign Up”.
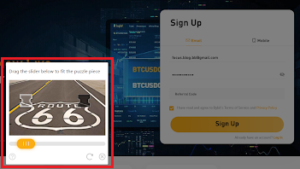
A verification page will appear. Please drag the slider to complete the verification request.
Finally, enter the verification code sent to your email inbox. Click “Complete Registration”.
Note: If you have not received the verification email, please check the spam folder in your email.

Register By Phone Number
Please select or enter the following information:
- Country code
- Mobile phone number
- Strong password
- Referral code (optional)
Make sure you understand and agree to the terms and privacy policy and after checking that the information entered is correct, click “Sign Up”.

Finally, follow the instructions, drag the slider to complete the verification request, and enter the verification code via SMS sent to your mobile number.
How To Complete Personal KYC Verification
Following is a guide to help complete Personal KYC verification on Bybit.
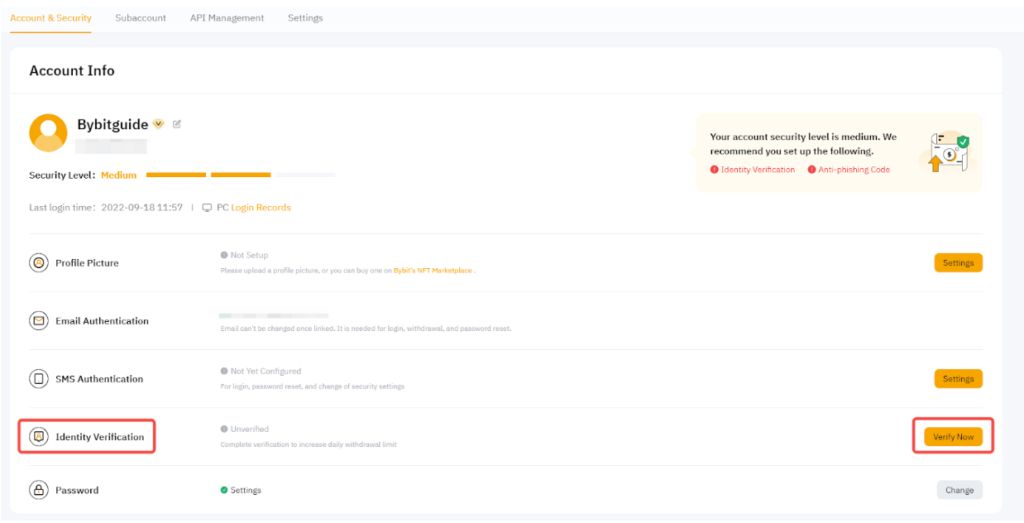
Step 1: Click the profile icon in the upper right corner of the navigation bar, then click Account & Security to enter the Account & Security page.

Step 2: Click Verify Now next to the Identity Verification column (under Account Information) to enter the Identity Verification page.
Level 1 Identity Verification
Step 3: Click Verify Now in Level 1 Identity Verification to get started.
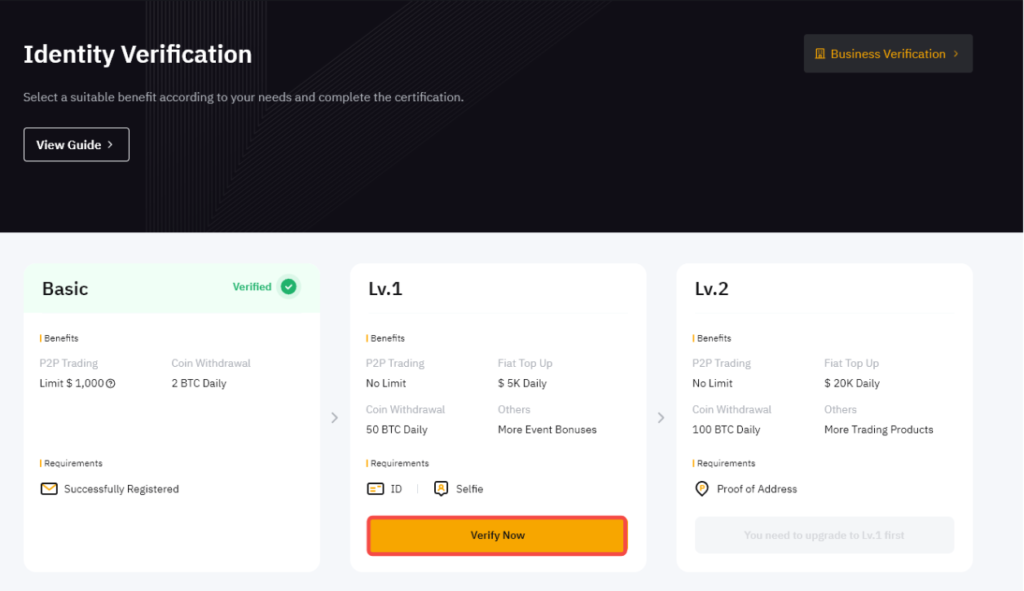
Step 4: Select the country or territory that issued your ID and your identity document type to upload the proof of identity document(s). Click Next to continue.

For Nigerian residents, you will need to enter your BVN number to verify your BVN (Banking Verification Number).

Tip: BVN is a unique identifier that can be verified across all financial institutions in Nigeria
Note:
- Photographs of documents required to clearly show full name and date of birth.
- If the photo upload fails, check that the ID photo and other information are clear and the ID card has not been altered in any way.
- Any file format can be uploaded.
Step 5: Complete the facial recognition scan with the laptop’s camera.

Note: If the face recognition page cannot be accessed after many attempts, it is possible that the submitted document did not meet the requirements or was sent too many times in a short time. If this is the case, try again in 30 minutes. If the issue remains unresolved, please contact Bybit Customer Support.
Step 6: To request verification of the submitted document, click Next.

Once the information has been verified, the top left corner of the Level 1 window will appear as a Verified icon. Your withdrawal limit has now been increased.

Level 2 Identity Verification
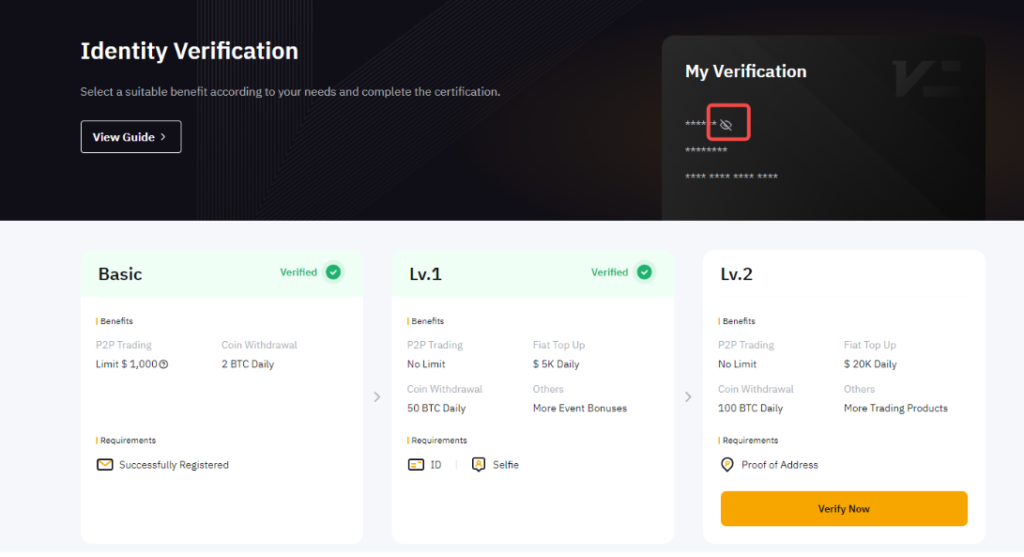
- If a higher limit is needed, increase to Level 2 residency verification and click Verify Now.
- Agree to the user data agreement and upload the required documents.

Bybit only accepts Proof of Residence such as utility bills, bank statements, and proof of address issued by the State. Dates on Proof of Residence are required within the last three months. Documents older than three months will be rejected.

- After Bybit verifies your information, your withdrawal limit will be increased.
- To check the information sent from the Identity Verification page, click the “eye” icon to view your information. You need to enter your Google Authenticator code to view your information.
How To Protect Your Bybit Account
How To Protect Your Account
- Bybit takes many steps to ensure the security of your account. Bybiti also recommends that you use more ways to better protect your account. Here are two (2) simple tips for you.
Tip 1: Create a Strong Password
- Strong passwords are one of the best ways to keep your account secure and protect your personal information from hacker attacks.
- The more unique the password you use, the more secure your assets are. An ideal strong password will include a variety of characters: both upper and lower case letters, numbers, and symbols. Also, avoid using easy-to-guess information like date of birth, address, and phone number.
Tip 2: Enable 2FA
Setup Via Web: Click on “Account and Security” in the upper right corner of the page to enter the account and security page.


Then just do the following steps:
1. Open the Google Authenticator app. Click the “+” icon and select “Scan QR Code.”


2. Scan the QR Code. The Google Authenticator app will randomly generate a 6-digit 2FA code on the respective account.
3. Enter the 6-digit code and click “Confirm”.

Note:
- To ensure maximum account and asset security, Bybit recommends that you always associate 2FA Bybit with Google Authenticator.
- Record the passcode and store it in a safe place. This key will be required when you link to the new Google Authenticator.
How To Deposit On Bybit
Are you looking for instructions on how to deposit money on Bybit? Right here! Here is a detailed operation procedure that makes it easy for you to top up by transferring crypto from your wallet or depositing fiat money into your Bybit account. You will need to click on “Assets” in the upper right corner of the Bybit homepage.

You will be navigated to the “Assets” page in the “Spot Account” section. Then, click “Deposit” in the column of the currency you want to deposit.
How To Deposit USDT On Bybit
- Take USDT as an example: After clicking “Deposit” you will be directed to your Bybit deposit address. From here, you can scan the QR code, or copy the deposit address and use it as the receiving wallet address for you to send money to.
- Before proceeding, make sure you have selected the correct chain type – ERC20, TRC20 or OMNI.
- Please do not transfer any other cryptocurrencies to the wallet address. If you do, the property will be lost forever.


Buy Crypto With Fiat


Step 1: Choose the fiat currency you want to pay. Click on “USD” and a drop-down menu will appear.
Currently, 59 fiat currencies are supported including AUD, BGN, BRL, CAD, CHF, COP, CZK, DKK, DOP, EGP, EUR, GBP, HKD, HRK, IDR, ILS, INR, JOD, JPY, KES, KWD, LKR, MAD, MXN, MYR, NGN, NOK, NZD, OMR, PEN, PHP, PKR, PLN, RON, RUB, SEK, SGD, THB, TRY, TWD, UAH, USD, VND, ZAR, ARS, AZN, CLP, CRC, GEL, HUF, KZT, MDL, NAD, UYU, QAR, SAR, AED, and UZS.
You can check the allowed buying limit for each currency in the input box. This limit may vary depending on the service provider you choose. For example, limit each BTC purchase through MoonPay to a minimum of $30 and a maximum of $12,000. While Banxa has a maximum limit of $15,000.

Step 2: Select the crypto you want to receive at your Bybit wallet address. Currently, only BTC, ETH, and USDT are supported.

Step 3: Enter the amount. You can enter the deposit amount based on fiat amount (e.g. $1,000) or crypto amount (e.g. 0.1 BTC) depending on your needs.
Also, you can check the reference price on the bottom right.
Step 4: Choose from the list of service providers.
Depending on the fiat and cryptocurrency that the user chooses, the respective service provider is displayed in the list. For example, when buying BTC with USD, there are three providers: Mercuryo, MoonPay, and Banxa. They will be ranked from top to bottom with the provider with the best conversion rates ranked first. We may collect the following information from a list of service providers.
- Service Provider Name
- Reference quote and estimated transfer time
- Estimated Convertible Cryptocurrency
- Supported payment methods and the “Buy” button

Note
Real-time quotes are for reference only. Please refer to your service provider’s website for exact rates. Real-time quotes in the upper right corner will be refreshed every 30 seconds. You can also click “Refresh” to get the latest quote.
Step 5: Click the “Buy” button.
An information window will appear. Please read carefully to ensure that you understand and agree to the terms and conditions. Continue by clicking the “OK” button. You will be directed to the official website of the third-party payment service provider.

Note
- For first-time users, you need to first create an account on Bybit, then complete Know-Your-Client Verification (KYC) to unlock different levels of deposit and withdrawal limits.
- After successfully depositing fiat money into Bybit, you can click “History” to view transaction history.

How To Withdraw From Bybit
Click on “Assets” in the upper right corner of the home page and you will be directed to the Assets page under the Spot Account. Then click “Withdraw” in the column of the currency you want to withdraw.


- Withdrawals will be made directly through a Spot account.
- If you want to withdraw assets in the Derivatives account, please first transfer assets in the Derivatives account to the Spot account by clicking “Transfer Funds”.


Take USDT as an example.
- Before you can submit a withdrawal request, please make sure you have linked your withdrawal wallet address to your Bybit account.
- For web traders, if you have not added a withdrawal address, please click “Add” to set up your withdrawal address


- Select “Chain Type”: ERC-20 or TRC-20
- Click “Wallet Address” and select your receiving wallet address.
- Enter the amount you want to withdraw, or click the “All” button to withdraw in full.
- Click “Submit”
- Note that, ERC-20 and TRC-20 have different withdrawal addresses. Be sure to enter the specific address when withdrawing USDT via TRC-20.
- Be careful! Failure to select the corresponding network will result in a loss of money.
- For XRP and EOS withdrawals, be sure to enter your XRP Tag or EOS Memo to transfer funds. Otherwise, it will cause an unnecessary delay in your withdrawal.

After clicking the “Submit” button, you will be directed to the withdrawal verification page.
The following two-step verification is required.

Email confirmation code:
- Click “Get Code” and drag the slider to complete the verification.

An email containing your email verification code will be sent to your account’s registered email address. Please enter the verification code you received.

Google Authenticator Code:
- Please enter the six (6) digit 2FA Google Authenticator security code you received.

Note:
- If the email is not found in your mailbox, please check the spam folder in your email. The verification email will only be valid for 5 minutes.
- Withdrawals can take up to 30 minutes.
- Once the system has successfully verified your 2FA code, an email containing details of the withdrawal request will be sent to the email address registered to the account. You will have to click on the verification link button to verify the withdrawal request. Please check your mailbox for an email containing withdrawal information.


