Instructions For Creating An Account And Depositing – Withdrawing Money On PHEMEX
How do I register an account on Phemex?
To register a new account on Phemex, perform the following steps:
- Go to Phemex.com and click Register on the top right corner of the page.
- Enter your email address, password, and an invitation code if you have one. Click Continue.
- You will be sent a verification email and code. Enter it in the next window that appears.
- Begin trading!
NOTE: Passwords must contain more than 8 characters including an upper-case, lower-case, special character, and digit.
How Do I Verify My Account? (Basic & Advanced KYC)
To verify your identity on Phemex, simply complete the following steps:
1. Register or log in to Phemex.com

2. On the right hand corner of the website, click on the circular icon to go to your Account.

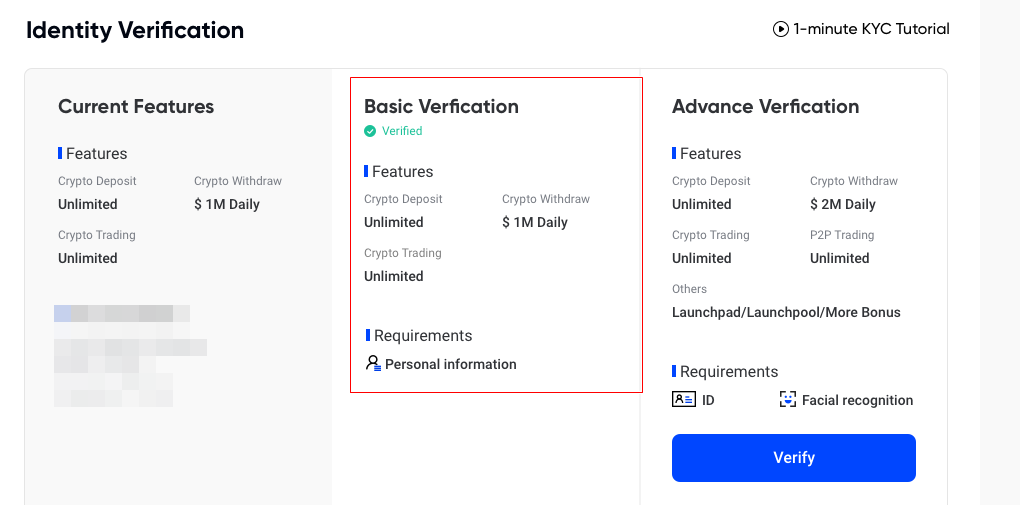
3. On the left side of the page, click on Overview, where all your profile info will be displayed. Scroll down to Identity Verification and look at Basic Verification. If you have not done the Basic Verification yet, a red text will appear reading “Your account is currently not verified”. Check what requirements are needed for that verification then click on Verify. For Basic Verification, you will need to input your personal information.

4. Once you have successfully completed the Basic Verification, you will see a green tick and a green text reading “Verified” under Basic Verification.

5. Now that Basic Verification is complete, it’s time to move on to Advanced Verification. This next page will prompt you to get your ID or documentation ready. Click Start when ready. At this stage you have two methods to upload an image. If you choose to Continue on Mobile, then follow the instructions on your mobile device but you must keep this webpage open until KYC verification is completed, or else your application may be incomplete. If you choose the Take photo using webcam option, then prepare your ID and click on Start. Once your webcam launches, align your photo ID and make sure the contents are clear and readable. Click the camera icon to take the picture. If the image is correct and clear, click Confirm. The next page will process your face verification. Center your face within the screen and click Start when ready.

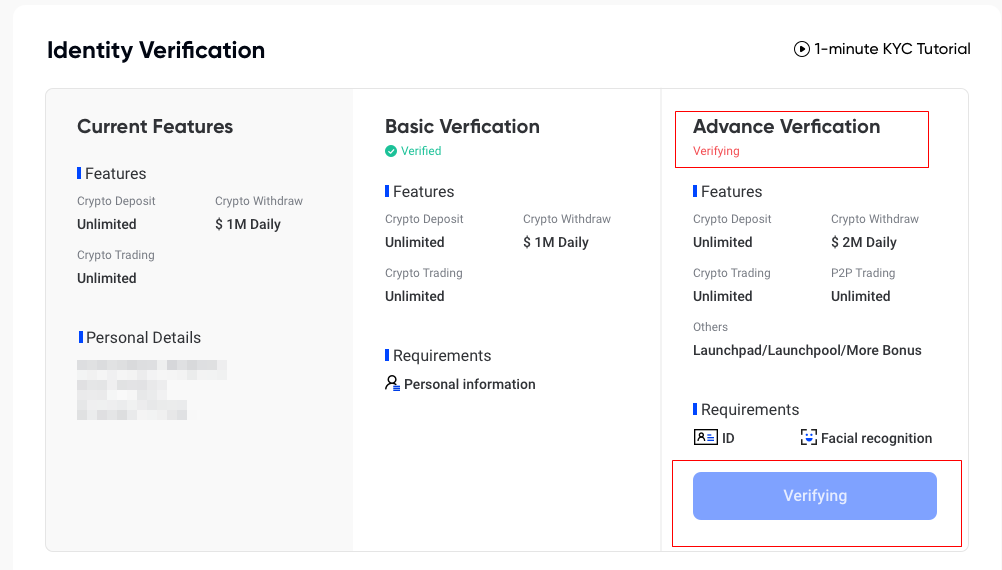
6. After successfully uploading all the required information for the Advance Verification, users must wait for the process to be completed. A red text reading “Verifying” will appear, which will reflect on the blue button below as well. Please be patient during this time and wait for your results.

7. In the case that your Advance Verification has failed, do not worry. Just make sure to check that you have completed the requirements and click Try Again.

8. In the case of exceeding the maximum attempts, users can attempt to try the Advance Verification again the next day.

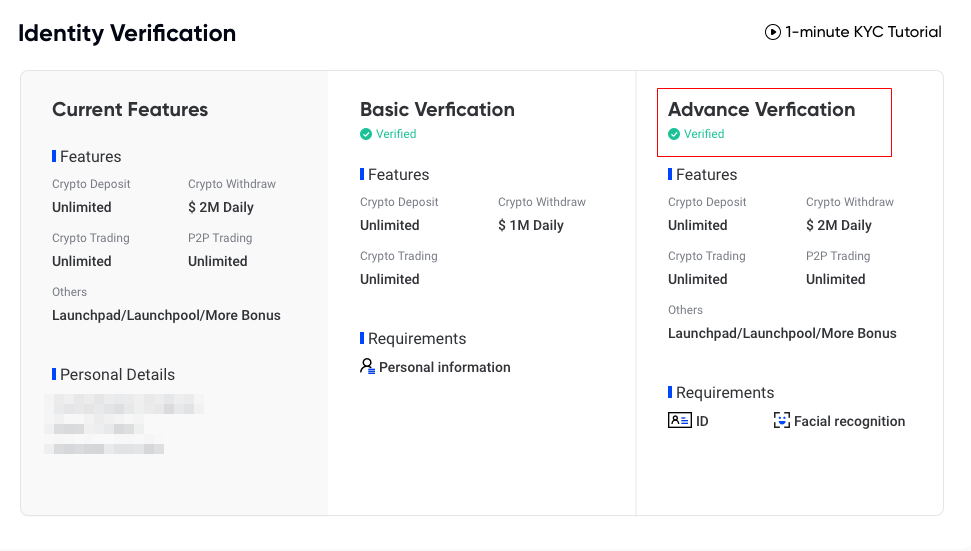
8. Once the process is complete, the labels or tags on your Account Overview page should now indicate “Verifying”. If the verification was successful, your tags will turn green and read “Verified”.

9. In some cases, users might already have completed both Basic and Advanced Verification but will be missing some latest information. If you see “Supplementary basic information” in green, it means that you need to update or add on to your existing data. Just click on the blue button “Verify” and update your personal information.

Congratulations! You have completed both your Basic KYC and Advanced KYC, and you are therefore an officially verified user on Phemex. Enjoy all your benefits and happy trading!
How to Deposit Crypto to Phemex? (Web)
The act of “making a deposit” refers to transferring funds/assets from another platform into your Phemex account. Here is a step-by-step tutorial on how to make a deposit on the Phemex Web.
Log in to your Phemex Web, click “Deposit”and pull up the right sidebar to select the deposit method page.Phemex supports two types of cryptos deposit methods:Onchain Deposit and Web3 Wallet Deposit.


For Onchain Deposit:
1. First, click “Onchain Deposit” and select the coin and network that you would like to deposit.
- Make sure you select the same network on the platform where you are withdrawing funds for this deposit.
- For certain networks, such as BEP2 or EOS, you must fill in the Tag/Memo when making a transfer, or your address cannot be detected.
- Please confirm the contract address carefully before proceeding. Click the contract address to be redirected to the block explorer to view more details. The contract address of the asset you’re depositing must be the same as the one shown here, or your assets might be lost.

2. You can select to deposit to Spot Account or Contract Account. Only USDT/BTC/ETH support deposit to contract account.

3. Click the copy icon to copy your deposit address and paste it to the address field on the platform you intend to withdraw crypto from.
Alternatively, you can click the QR code icon to get a QR code of the address and import it to the platform you’re withdrawing.

4. After confirming the withdrawal request, it takes time for the transaction to be confirmed. The confirmation time varies depending on the blockchain and its current network traffic. Once the transfer is processed, the funds will be credited to your Phemex spot wallet shortly.
5. You can check your deposit history by clicking on Assets, then navigating to Deposit, where users can view the data at the bottom of the web page.

For Web3 Wallet Deposit:
1. First, click “Web3 Wallet Deposit” and select wallet that you would like to deposit.


2. Taking Metamask as an example: Click Metamask and complete wallet connection verification.


3. Select the coin and network and enter amount that you would like to deposit.
- Make sure you also selected the same network from the wallet where you are withdrawing funds for this deposit.
- Make sure that you have funds on the chain of wallet selection.

4. Complete Wallet security verification after submitting the Deposit application, then wait for confirmation on the chain.


5. You can check your deposit history by clicking “View Deposit History” or clicking on Assets then navigating to Deposit.

How do I Make a Withdrawal? (Web)
1. Firstly, register or log into your Phemex account. Then click on Assests, followed by Withdraw.

2. Select the coin that you would like to withdraw. Funds for withdrawal must be available in or transferred to your Phemex Spot Wallet. Please make sure you have also selected the same coin on the platform where you are depositing funds to for this withdrawal. You will see the first coin that you have enough balance in. Make sure to only select the coin that you have enough balance in your spot wallet to withdraw.

3. Next, select your network.Please make sure to choose a network that supports both the platform and Phemex. Ensure that Phemex has your assets and then can proceed to withdrawal.

4. When you select crypto coins like XRP, LUNC, EOS, etc… They might require a tag/memo. Therefore, for those coins that require a tag/memo, please ensure that you have input the correct tag/memo for your withdrawal.

5. There are 2 methods that you can enter a withdrawal address:
i. You could just paste the address you copied.
ii.You can click the icon right of the address input box, then select one from Address Management.

6. Next, enter the withdrawal amount that you desire. Please take note of the minimum amount, the transaction fee, the available balance, as well as the limit remaining today. After confirming everything, click Withdraw to proceed.

7. Next, you need to verify the transaction. Please enter your Google Authenticator code for verification. This step is required for keeping your assets safe.

8. You will be receiving an email confirmation regarding the withdrawal. Please check your email within 30 minutes as the link will expire after that. If you did not click the link within 30 minutes, your withdrawal will be considered invalid.

9. You can double check the withdrawal details again via the confirmation email. Once everything looks right, click Confirm to proceed.

10. Once you have finished all the withdrawal steps, you can check your withdrawal history by clicking on Assets, then navigating to Withdrawal. This is where users can view the data and it is at the bottom of the web page.

If the withdrawal status is still pending, you can click Cancel to cancel the withdrawal.

And that’s it! Congratulations, you now know how to withdraw funds on Phemex.


